Prerequisites
IDE
Android Studio
We recommend using Android Studio
physical terminal
Keys (Development/Production)
To start development, you need a physical endpoint with valid development or production keys. The keys used must be from DEV, if the purpose is application development. The keys used must be from PROD, if the objective is to capture transactions with existing applications. Keys must be purchased from the terminal manufacturers.
See which terminals are approved
Warning
Currently it is not possible to use payment integration in Android emulators or SmartPhones. This solution was developed for POS (Point Of Service) terminals.
PayStore Portal
Registrations (Facilitator, Establishment, Terminal)
It is necessary to access the PayStore Portal development environment for this first contact and register needed to initialize the terminal for the first time. In this process, contact the support team.
PayStore APKs required
Installation Sequence
PayStore apps must be installed on the terminal. Installation must be done in the following order:
| Applications | Description |
|---|---|
| 1. payments | Payment transactions |
| 2. platform | Manage Terminal |
| 3. acquirer | Integration with acquirers |
| 4. client | Store PayStore |
For versions equal to or greater than 2.12.x, the application is unique and it is not necessary to follow the installation order:
| Applications | Description |
|---|---|
| 1. payments | Payment operations, PayStore store, integration with acquirers and Manage terminal |
For more information about PayStore apps, see PayStore Apks
Info
With ADB properly installed and configured on your machine, open the prompt inside the directory with the files, and run the command as above:
adb install -r [arquivo]
If you prefer, use the program PayDroid
Open the payment application
Important
When opening the payment application (payment), the application will become main. by clicking on the app icon or home button
Initialize the terminal
PayStore Initialization
Warning
To continue, it is important that, at this point, your terminal is already initialized with the PayStore. If you have questions about this procedure, please contact the support team
Important information
For the operation of the application integrated with payment, the above steps are essential and must be followed. If they are not followed, the application may not work. Therefore, follow a step-by-step summary list.
PayStore applications must be installed on the terminal. Installation should be done in the following order for 2.11.x versions:
| Step by step | Acción |
|---|---|
| 1. Verify encryption keys | Terminal |
| 2. Install a paid application | Terminal |
| 3. Open the payment application | Terminal |
| 4. Configure terminal in portal | PayStore |
| 5. Credentials of the terminal | Terminal |
| 6. Initialize the terminal | Terminal |
Initial features of the application
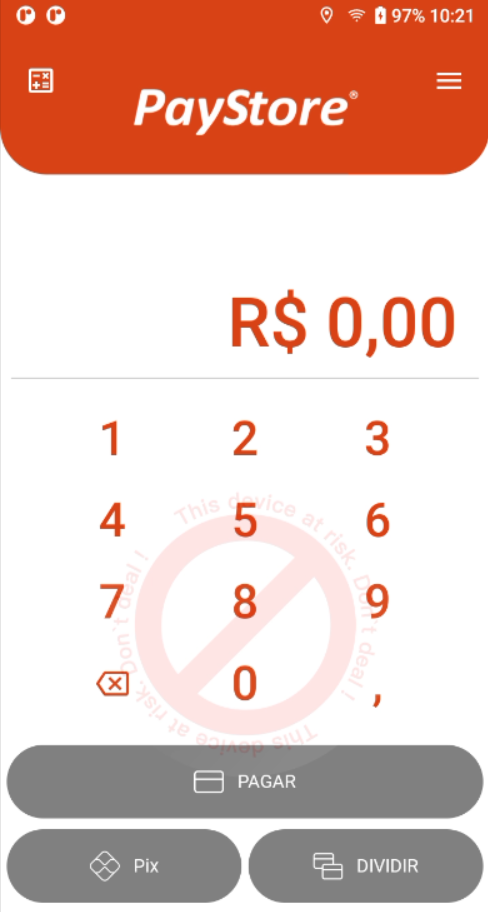
By performing the above steps, the application must have started. Below are some examples of the possible application screen, after the above settings. There are two options for initial (idle) screens, the standard screen, with the on-screen payment calculator and the API related mode API screen enabled in PayStore. It is important that these screens are displayed, as this is a way to ensure that the application is correctly installed, accredited, initialized, etc.
IDLE display
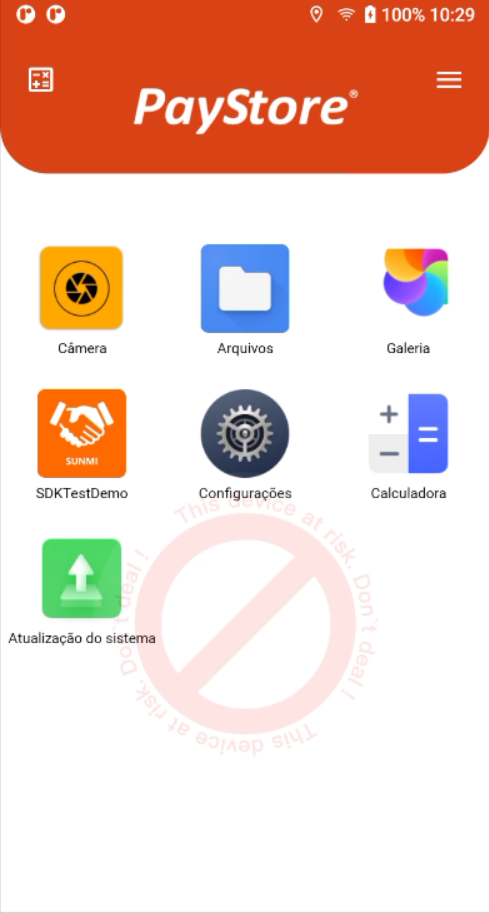
IDLE display (API mode)
This option removes the option of the calculator, in the IDLE screen, thus, it is the responsibility of the integrated application to call the payment method. This option is enabled in the logic tab on PayStore. When changing the information of a logic.
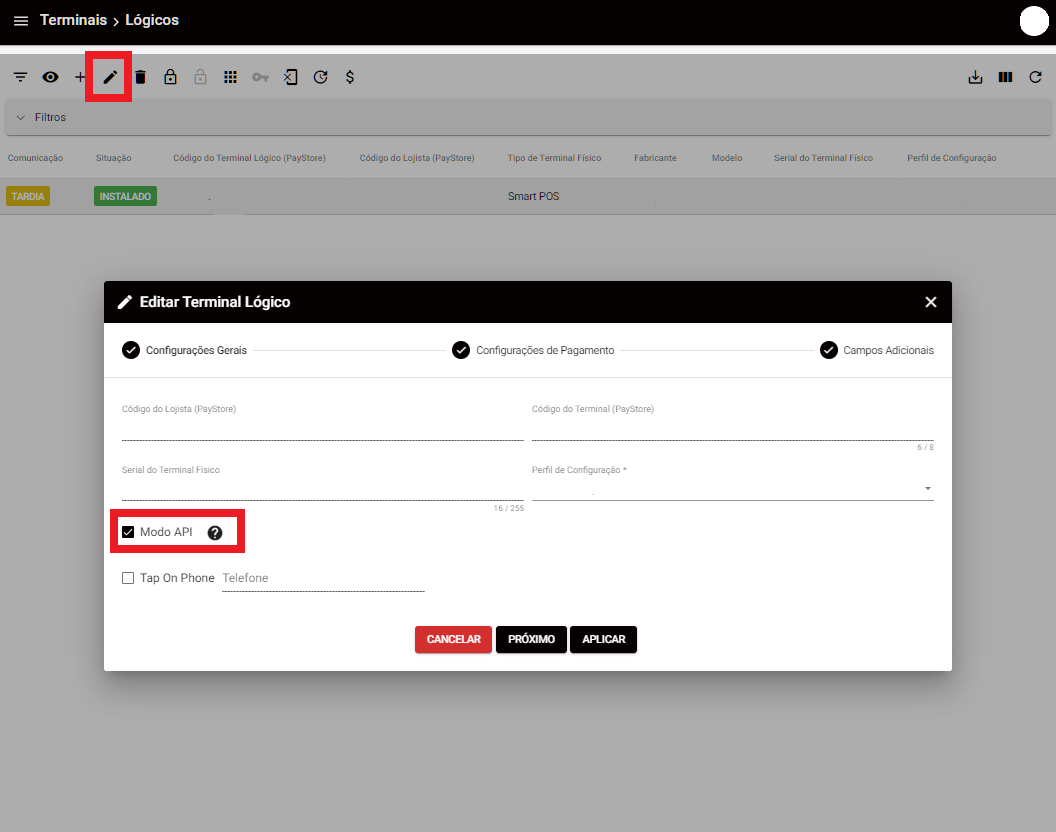
Below is a demo image of the option that enables API mode in logical. If you change the option you need to initialize the terminal.
Documentation tour
Read the documentation
Before actually starting, it is important to know what tools are available for development. Therefore, one must understand the architecture, the applications involved and how they communicate. See the API References and explore the full power of this integration.
Sample Applications
Android Demo App
To facilitate its integration, we created a project demo developed on Android and already integrated with the Payments app. Explore this project to see the integration in action.
React-Native Demo App
We created this project demo so you have the freedom to choose which technology to use in your application development. It is possible to integrate your applications that were not developed, necessarily on Android, with our payment solutions.
Start Integration
Congratulations!
If you've come this far, it's because you already have all the information you need to start developing your application integrated with our payment solution. If you have any questions, please contact the support team.